
Planning an epoxy flooring project can be an exciting opportunity to transform your space into a stunning, durable surface that stands up to heavy foot traffic and daily wear. Epoxy flooring is known for its resistance to chemicals, stains, and abrasions, making it especially popular in garages, commercial facilities, and even residential interiors. Whether you want to create a clean, sleek look or opt for more decorative textures, organizing your project from the outset will help you make informed decisions about color, finish, timeline, and budget. Below are some detailed steps to ensure your epoxy flooring project proceeds smoothly and with confidence.
Determining Your Design Goals
Before considering specific types of epoxy coatings, start by clarifying the overall look and function you want for your floor. Think about how the space is used on a daily basis—does it need to endure heavy traffic, vehicle storage, or exposure to chemicals? Consider the atmosphere you hope to create. Perhaps you want a bright, reflective surface to enhance interior lighting or a deeper, more subdued finish that complements adjacent décor.
By visualizing the end result, you’ll be better equipped to work with epoxy specialists on selecting the right materials and techniques. If you are aiming for a bold pattern or a metallic pigment effect, be sure to share these preferences early on; it helps in planning additional steps, such as color blending and layer buildup. According to a market analysis from Grand View Research, the global epoxy resin market continues to expand, suggesting a wide range of epoxy-based products have become more accessible, including those that offer high gloss and enhanced durability.
Deciding on Color, Finish, and Style
Once you have a solid idea of the space’s primary functions, delve further into the design elements such as color and finish. Epoxy coatings come in a variety of hues, from neutral grays to vibrant blues or reds, allowing you to match corporate branding or personal style preferences. Decorative finishes, such as terrazzo and metallic epoxy, can mimic the shimmer of natural stone or create a luxurious marbled effect. Talk with an epoxy professional to see physical or digital color samples, as lighting conditions and surrounding décor can greatly influence your final choice.
An important factor to remember is the gloss level. High-gloss finishes beautifully reflect light but may show dust and footprints more readily. If you want to mask minor imperfections or reduce glare, a matte or satin finish could be the right pick. Since real-world spaces differ, it helps to see reference images or actual finish samples to confirm which sheen aligns best with your vision.
Estimating Timelines and Scheduling
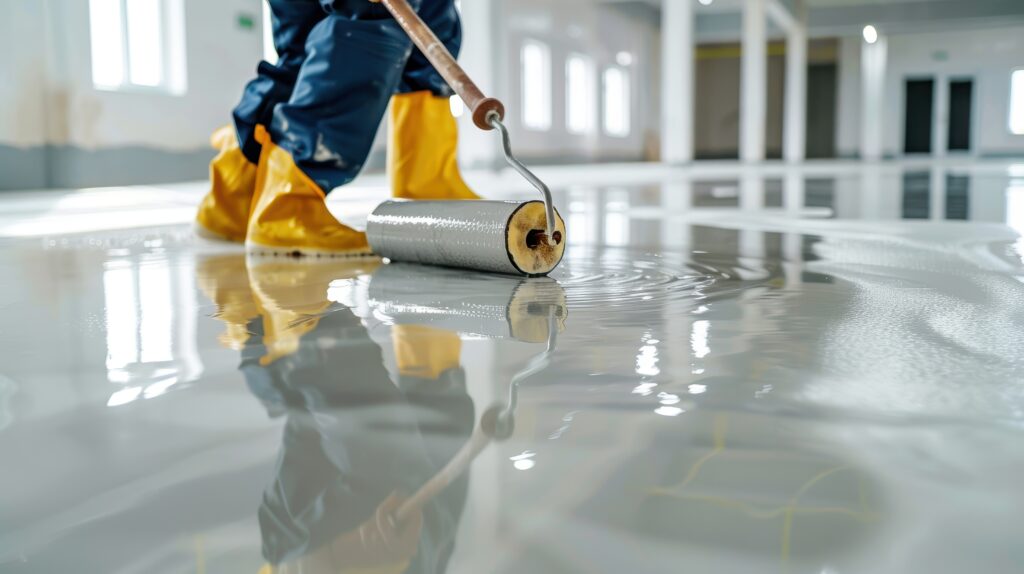
Time management is crucial if you want a seamless transition from planning to the day of installation. First, work out how soon you need to use the space. Are you rushing to meet a grand opening date or a personal move-in deadline? Epoxy flooring typically involves multiple steps—surface preparation, primer application, basecoat, possible decorative flakes or pigments, and a clear topcoat. Each coat requires sufficient drying or curing time, which can vary by weather conditions and product type.
Coordinate your timeline with the availability of epoxy specialists, especially if you have a specific installation date in mind. Many flooring jobs can be completed in a couple of days, but schedules can be impacted if a moisture barrier or more extensive preparation is needed. Communicate any timing constraints early to your contractor to prevent unexpected delays.
Budgeting Effectively
Alongside your timeline, establishing a realistic budget is a key component in laying the groundwork for a successful project. At its simplest, costs include materials (such as the epoxy resin and topcoat products), labor, and any optional design enhancements. If you plan on adding special flakes, metallic pigments, or custom logos, expect the total to increase. Working with a reputable epoxy flooring team generally ensures accurate quotes based on your design goals, the size of the floor space, and the complexity of the installation.
Labor costs can also fluctuate depending on the preparation work the floor requires. If the existing surface has cracks, stains, or uneven areas, additional patching materials or tools might be needed to ensure a smooth, professional-looking finish. While budgeting, remember that high-quality materials often mean longer-lasting floors, reducing the likelihood of future repairs or recoating.
Collaborating with Epoxy Experts
One of the most influential decisions you’ll make is choosing a qualified epoxy flooring specialist. A professional with industry experience brings invaluable insights on product selection, surface prep, and special effects. Besides technical knowledge, a reputable contractor will provide you with a timeline and design plan that aligns with your needs, ensuring the job is executed within your budget and to your aesthetic standards.
Apart from checking references, it can be beneficial to explore the contractor’s previous work through a portfolio or showroom. Looking at real-world examples of finished floors helps you anticipate outcomes and refine your expectations. A knowledgeable specialist will also advise on upkeep—teaching you how to clean and maintain the fresh epoxy coat for long-term satisfaction.
Final Steps Toward a Long-Lasting Epoxy Floor
Once you have planned out every detail—design, color, schedule, and budget—the final phase involves careful preparation and installation. Your contractor will typically inspect the surface for cracks or moisture issues, which must be addressed to ensure optimal adhesion. After that, they’ll begin priming, layering epoxy, adding any decorative flourishes, and applying the topcoat for durability and shine.
Throughout the process, maintaining clear communication is essential. If there are any surprises, such as unexpected subfloor conditions, you and your contractor can work on adjustments swiftly. After installation, remember to follow any recommended curing guidelines before placing furniture or walking on the newly finished surface. This period can range from a few hours to several days, depending on product specifications and local climate.
Looking to Get Started?
When you’re ready to move forward with your epoxy flooring project, Epoxy Elite is here to guide you. Our team of trained professionals can help you choose colors, finishes, and installation schedules suited to your space while ensuring every step is completed to your satisfaction and within your budget. To learn more about our services or schedule an on-site consultation, feel free to visit our Contact page. We look forward to helping you transform your floor into a resilient, visually striking centerpiece that you can enjoy for years to come.